Tag Archives: Garden Tips

Mark & Ben Cullen: In Favour of Real (Trees)

Christmas Ornaments

Garden Tips From Mark & Ben

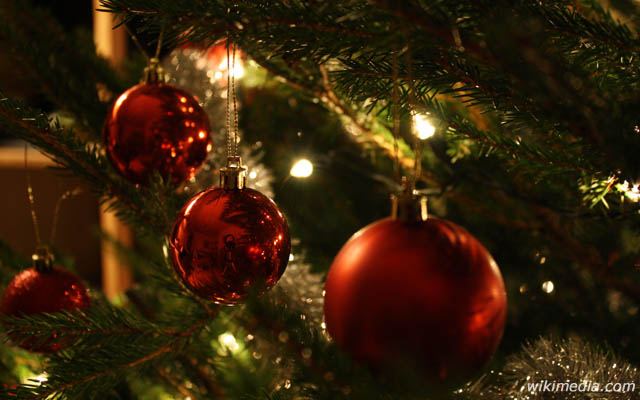
Every year we receive emails asking if we recommend the use of real trees vs. artificial for Christmas.  This is an opportunity to finally set the record straight on this issue.

In our opinion, real Christmas trees are the winner, hands down.  The fresh cut Christmas tree that you buy off the lot, or from a reliable retailer, is plantation grown, not cut from the wild.  It is planted, nurtured, and harvested like any agricultural crop. This one, though, takes up to 10 years to produce a marketable specimen.

The tree that is planted in the ground is 3 to 4 years old at the time.  Therefore, the tree that you buy may be up to 14 years old from seed germination to the day that you decorate it.

Fresh cut trees are, well, fresh.  They are cut in late fall and trucked to retailers across the country in early November.   They do not ‘dry out’ while they are outdoors but they can dry out in your home quite quickly, which is why it is important that you place your tree indoors only when you are ready to enjoy it and that you use a tree stand with a large water capacity and that you keep it filled with water.

The land on which Christmas trees grow (about 40,000 acres in Canada) is generally ‘marginally’ productive farmland.  You would not want to grow a food crop on much of it as it is rocky, acidic and often hard to access.  Deer and other wildlife forage through Christmas tree farms.  They enjoy the protection that they provide, and many songbirds use the trees for nesting.


The Trees

Mark’s favourite cut Christmas tree is the Fraser fir (Abies fraseri).  It has a lovely evergreen scent, the needles are soft to the touch, it holds moisture in its needles longer than most species reducing ‘needle drop’ which further prevents a lot of clogged vacuum cleaners around New Years.

His second favourite tree is the Balsam fir (Abies balsamea), for many of the same reasons he loves the Fraser, but the needles are shorter and therefore you won’t hang as many ornaments on it.

The Scots pine (not ‘Scotch’) (Pinus sylvestris) is a native of Scotland, with long, stiff needles.  The trunk is often not straight, though a good specimen can be.  Needle retention is average.  A generation ago it was #1 on the market by far but now represents a fraction of it.

White spruce (Picea glauca) is a problem indoors.  If you are going to bring one home for Christmas, do yourself a favour and keep it out of doors until a couple of days before Christmas and take it back out a couple of days afterwards.  The needles drop like rain when they become dehydrated, which won’t take long.

We spray Wilt-Pruf on cut Christmas tree before we bring it indoors as this anti-desiccant helps to hold moisture in the needles, reducing needle drop and fire hazard.

For many Canadians, a fresh cut Christmas tree can be recycled by just leaving it at the end of your driveway for municipal services to pick it up. You paid for this service when you paid your taxes.  Wise people take advantage of it.  Much of that mulch is used in public parks in the spring to protect the root zone of permanent trees and shrubs.

So, fresh cut Christmas trees look good, smell nice, are environmentally the right choice, they produce jobs for Canadians and habitat for wildlife while growing.

We rest our case.

For more advice and answers to over 10,000 gardening questions sign up for Mark and Ben’s free monthly newsletter.

Article originally appeared in Reno & Decor December/January 2017 


Mid-Way (Tips from Mark & Ben Cullen)

Around the Acres - Mark Cullen

Garden Tips From Mark & Ben

This week marks the peak performance of your garden. From this day forward, through the fading days of autumn, your garden will be in decline.

While there are some fabulous early spring flowering plants that you have enjoyed and other plants that bloom best in October that are ahead of you, many vegetable and fruit crops are yet to reach the crescendo of their ripeness. The best of their season lies before us. We are standing on the Continental Divide of the gardening season: on your right is the past 4 months where planting is history. On your left is the next 4 months. Your job is to manage the flow of the season in your favour.

Where sowing seeds, planting, and weed control dominated your thoughts and actions previously, things are now about to change dramatically. Fact is, the real productivity in your garden lies ahead of you.

What gardeners busied themselves with from April through July is now done. If you didn’t plant, sow, or weed before this, there is not much point in getting at it now, unless you are starting a new landscape altogether. We are talking about the established garden that should be flowering to beat the band and the vegetable garden that is on the threshold of producing the best crop of food ever. While our rhubarb, asparagus, strawberry, raspberry, and cherry days are behind us for this year, we still have my tomatoes and apples to look forward to. Not to mention peppers, potatoes, Swiss Chard and all of the cucurbits like squash and cucumbers, and list goes on.

The shortening days of August and September slow the growth of weeds in the garden.

For more advice and answers to over 10,000 gardening questions sign up for Mark and Ben’s free monthly newsletter.


Early Summer To-Do List from Ben & Mark Cullen

Clematis

Garden Tips From Mark & Ben

Here are some things you should be thinking about in June:

  • Hot crops like corn, zucchini, squash (all cucurbits), peppers, and potatoes can be planted now, if you haven’t already. Those who planted in May will have a head-start.
  • Mulch! A 5 cm layer of mulch can cut down watering by 70% and weeding by 90%. Mark uses shredded cedar or pine bark mulch, and Ben uses straw. To each their own.
  • Fast growing flowers can be sown now wherever you have a blank space in the garden. There are lots of great wildflower mixes out there that can bring pollinators to your garden. An easy way to plant these is by pouring the seed mix into a bucket with some dry potting mix, sand or vermiculite (one packet/25 sq ft). Pour the seed/sand or soil mixture back and forth between two buckets until they are fully mixed. Broadcast the seed by hand over a bed of soil and rake it in.
  • Roses, peonies and clematis will start flowering this month – get out there and make sure they are supported before they fall over under the weight of their massive blossoms!
  • Containers can be planted up now with annuals. Feed them once with a feed-and-forget fertilizer (slow release) and add a healthy amount of compost to the potting mix for season-long performance.
  • Herbs can be planted right along side the rest of your containers and harvested immediately. Be careful not to over water; with the exception of Basil, most herbs like to dry out between watering.
  • Stake your tomatoes! Getting them off the ground will double your crop. We like the Mark’s Choice Spiral Stake…not just because it has Mark’s name on it. Mark chose this product because it is the easiest way to stake, save yourself the hassle of tying tomatoes.

Connect with Mark and Ben and sign up for their free bi-monthly newsletter. Also, facebook, twitter, Instagram and podcast! www.markcullen.com 10,000 gardening questions answered.

10 Reasons To Choose Unilock

Unilock Stone in Backyard

As the original manufacturer of concrete patio pavers in North America, UNILOCK® has earned a fine reputation for quality and become one of the most trusted names in the industry. With more than 10 billion stones in the ground to date, we’ve sold more pavers than any other company.

UNILOCK® knows there’s more to successful project than what you see on the finished surface.

Here are 10 Reasons to Choose Unilock

The Unilock Design Centre  

1.  Styles You Can’t Get Anywhere Else
From the sleek, contemporary look of umbraiano to the timeless feel fo weathered European Cobblestones and everything in between, Unilock has something for everyone’ landscape dreams.

2. Unilock Idea Centre
The Unilock Outdoor Idea Centre is a real place where you can walk through inspiring displays of Unilock products in a full-scale outdoor setting. Let our friendly customer service staff show you our amazing products and help you create your dream plan.
We’ll even provide your with free product samples.

Unilock Pavers  

3. Advanced Technology
With products to suit every budget and a huge variety of material types, Unilock will make your landscape dreams come true!
EasyClean Stan Resistance: Factory sealed to provide integral surface protection from stains.
Reala Technology: Cast from natural stone, brick and historic European cobblestones.
Ultima Concrete Technology: Up to 4x stronger than poured-in-place concrete.
Colorfusion Technology: Randomly dispersed color and granite particles.

4. Greener Choices – Water Management
We began selling permeable pavers more than 25 years ago and have more experience in this area than any other manufacturer. Permeable pavers are a popular choice to unlock usable space in municipalities where non-permeable lot coverage is restricted. They allow water to flower through extra wide joints to replenish the natural eco-system.

5. Unsurpassed Durability
There isn’t a better paving products in the world. Unilock products set the standard for quality in the Industry.
Every Unilock product is…
♠ Durable
♠ Made with colorfast pigments
♠ Slip resistant
♠ Resistant to salt erosion
♠ Designed to tolerate oil and gas spills
♠ Backed by our Transferable Lifetime Guarantee

Unilock Patio  

6. The Go-To Product For Professionals
There’s good reason why the pros choose Unilock products. From architects and landscape architects to city engineers and commercial property owners, Unilock is preferred by professionals.
Many of the products featured in the Unilock Catalog have been installed in large scale commercial projects in some of the most prestigious spaces in North America. If Unilock is the choice of the pros, shouldn’t you choose us too?

7. More Experience Thank Anyone Else
Founded in 1972, Unilock was the first to manufacture paving stones in North America. Over the past 47 years, we have perfected our manufacturing process and have developed technologies to create products that set the bar for innovation and creativity.
Our world-class production facilities are renowned for their safety and cleanliness and are staffed with the most experienced production people in the industry.
This, in combination with our on going investment in technologically advanced equipment, ensures we’re able to provide the best in quality, consistency and design.


Unilock Worker using Stone  

8. Unbeatable Product Guarantee
Unilock was the first to offer a transferable Lifetime Guarantee on our manufactured products. That’s quite the commitment since we have almost 2 billion stones on the ground! you can sleep well at night knowing that Unilock is behind you 100%.

9. Guaranteed To Do The Job Right
A product is only as good as the workmanship used to install it. Unilock Authorized Contractors are rigorously screened and hand-picked for their quality workmanship and exceptional business practices which enables us to guarantee their workmanship for a period of two years. When you choose a Unilock Authorized Contractor, you can be assured that you are getting the best in the business.

10. We’re Here To Help
Unilock is a family owned company that cares about the success of your project. Contractors know that help from Unilock is only a phone call away and we’re committed to providing the best customer experience in the industry.

Unilock 1-800-UNILOCK
UNILOCK.COM

Don’t forget to drop by the Outdoor Do-It-Yourself Centre on Saturday, March 14, Unilock Day, to discover tips and tricks for choosing the right product, and handy how-to demonstrations.

OR, drop by the UNILOCK® Idea Centre in Georgetown to explore project ideas and get helpful advice.


Mark & Ben Cullen’s Ultimate To-Do List For November

Mark & Ben Fall Picture

Mark and Ben Cullen Garden Tips

Garden Experts Mark and Ben Cullen give us their list of things to do to get your gardens ready for winter.

We have been busy in our gardens getting ready for winter. Invest some time now for a great looking garden come spring.  Here is a list of our recommended activities:

  • Apply Wilt-pruf to broad leaved evergreens like rhododendrons, boxwood, holly and the like to prevent winter desiccation (apply when temperatures are above freezing).
  • Start your amaryllis bulbs now to make sure you are ready for our 2020 amaryllis photo contest. Every year we host an amaryllis photo contest. You will find contest details in our February newsletter. Start your amaryllis now and take photos when the fabulous blooms are at their peak. Subscribe to our newsletter for more info.
  • Wrap fruit trees. Wrap the trunk of fruit trees with a plastic spiral guard to prevent rodent damage in winter. Mice and rabbits can wreak havoc on young, tender bark.
  • Plant garlic cloves about 4 cm deep and 10 cm apart. Use loose, open, sandy soil as they like water to drain away from them. Your garlic crop will be ready to harvest next August. Watch our video.
  • Wrap evergreens with two layers of burlap. One layer to protect against the burning sun as it reflects off snow and another to protect evergreens from wind. This is especially true for cedars, junipers and like, that are on the east side of a road, where they catch the prevailing west wind with salt spray. Watch our video.
  • After the first serious frost, dig up your dahlias and lay the ‘bulbs’ (tubers) in the sun to dry for a day or two. Store in a large, craft paper leaf bag with dry peat moss or shredded newspaper in a cool but DRY place.   Plan to plant them up in March for a repeat performance next season.
  • Do not cut back fall flowering ornamental grasses, coneflower, rudebeckia and all of the autumn flowering plants that produce a seed head. The birds will forage the seeds well past the first snow fall.
  • Rake leaves onto your garden. Off your lawn, on to your garden. Or into your compost pile. Either way, they will rot down over the winter and provide needed nourishment to all plants that grow. Do not put them to the curb. Watch our video.
  • And look for the 2020 edition of Harrowsmith’s Almanac. Amazingly packed with essential information. www.harrowsmithmag.com Enjoy the last days of fall gardening and be sure to visit us at Canada Blooms, March 13 to 22, 2020. It will be an early spring!∼ Mark and Ben

For more advice and answers to over 10,000 gardening questions, visit www.markcullen.com and sign up for Mark and Ben’s free monthly newsletter.

Considerations for Choosing the Right Product and Colour for your home by UNILOCK®

Unilock Info Centre

As the original manufacturer of concrete patio pavers in North America, UNILOCK® has earned a fine reputation for quality and become one of the most trusted names in the industry. With more than 10 billion stones in the ground to date, we’ve sold more pavers than any other company.

UNILOCK® knows that choosing the right colour of pavers for your home can be a daunting task, so here is some advice to consider for projects you may be considering around your house.

Unilock Existing Architecture Consider Existing Architecture

For most projects, the house is the most significant structure to consider. Many homeowners feel compelled to match the color of their pavers to the color of their house but an exact match is not necessary and sometimes not ideal. Instead, try to stay within the same color ‘tone’; if your home’s brick or siding is a warm brown tone, consider paver options within this color family. Likewise, if your home is a cool grey, consider this family of colors for your pavers. In this case, Town Hall Heritage Red was chosen for this warm-toned home.

Unilock Applications Consider the Application

Different colors are well suited to different applications. For example, pool decks are best designed in lighter colors that absorb less heat from the summer sun and are more comfortable for bare feet. In contrast, a high traffic driveway, or BBQ area that is prone to spills may be better suited to a darker color. Choosing a paver that offers Easy Clean stain resistance is another option. Here we see Umbriano Summer Wheat used with a Copthorne Burgundy Red.

Unilock Key Elements Complement other Key Elements

In this backyard project, homeowners decided to pull colors from the home’s roof and trim to define a cozy firepit area. Any nearby structure can be used for inspiration, including natural elements like a rocky outcropping or a stand of trees. Consider using color as a method to establish different areas of your project (cooking, dining, lounging), to direct people from one area to another or to visually signal the edges of pools and steps. And don’t forget about pillars, planters and landscape walls. The color of these vertical elements can also be chosen to coordinate or contrast with the surrounding flatwork.

Unilock Accent or Border Add an accent or border

Think one color is boring? Add a border, accent or inlay in your design with a different color to create a subtle variation that is appealing to the eye. By using the same accent in your walls, pillars or planters you will create a cohesive look and feel, and make your project feel truly special. Products featured here are Artline, Brussels Dimensional, Series and Umbriano.

Unilock Mix and Match Mix and match online

Simply drag and drop various borders, accents and color swatches next to each other and start to envision the possibilities.

Unilock Samples Physical Samples

Visit one of our Outdoor Idea Centers and take home FREE product samples. Or ask your contractor to bring samples to your home. Seeing samples in natural light will show the truest color and can help you to visualize how the project will look next to your home and existing landscape.

Unilock 1-800-UNILOCK
UNILOCK.COM

Don’t forget to drop by the Outdoor Do-It-Yourself Centre on Saturday, March 14, Unilock Day, to discover tips and tricks for choosing the right product, and handy how-to demonstrations.

OR, drop by the UNILOCK® Idea Centre in Georgetown to explore project ideas and get helpful advice.

Unilock Downloadable Info Page

Garden Like A Pro: Pollinator Plants

Bee Pic from Pixabay.com

Mark and Ben Cullen Garden Tips

The decline of the honeybee and monarch butterfly population has our attention. As gardeners, our goal is to plant something that helps to attract and nurture the beneficial insects in our neighbourhood, provides natural beauty and colour AND is low maintenance.

Our solution: planting native plants in our outdoor space. This will provide a source of nourishment for pollinators while enhancing the local environment in measurable ways and creating a beautiful, low maintenance garden.

Inspired?  There are some ‘tricks’ that you need to keep in mind: so called ‘little things’ that will help you to maximize the positive impact of your efforts.  Here are our top tips:

1- Explore your options. And keep in mind that a succession of blooming times will maximize the population of pollinators. If you just plant Purple Cone Flower you will have masses of colour from mid July through late August but little else to show for your efforts over the balance of the season. We choreograph our pollinator gardens with crocus, daffodils and narcissus (late April through early May), Lungwort (pulmonaria), Foamflower, cilantro, oregano, Columbine and sweet woodruff takes over mid May through early June. Come early summer, we feature cardinal flower (a hummingbird magnet!), catmint, coral bells and many hosta varieties in our gardens.

As the season progresses, there are many plants that provide opportunities for foraging butterflies and feeding hummingbirds including Echinacea, rudbeckia, late flowering hostas and one of our favourites is borage. Come September and October, butterflies and bees love sedum spectabile, asters and monarda (bee balm) in our gardens.

Annual flowers that are pollinator magnets right into the fall months include sunflowers, zinnias, sweet alyssum and cosmos.

This is not an exhaustive list, but a starter to help get you thinking in the right direction.
Note that not all of our suggestions are native plants. In our opinion, if a plant is rich in nectar and/or pollen and therefore attracts pollinators it should be considered.

2 – Plant host plants. Monarch butterflies lay eggs exclusively on native milkweed. While it is late to start them from seed, it can certainly be done, and you will succeed in producing a healthy crop for next year if you get started now as milkweed is perennial. Once monarch larvae have hatched and fed on the milkweed, they move on to other food sources in your garden. Milkweed seeds are available on many seed racks at your favourite garden retailer including Home Hardware.

3- Place habitat. Garden retailers now offer a wide selection of habitat for many beneficial insects. Mason bee houses are available in a variety of models including a British import that features paper straws in a 10 cm round nesting ‘box’ that you hang on an east or south facing wall. Mason bees lay their eggs in the straws and you encourage an increase in effective pollinators to your neighbourhood. Look for ‘insect hotels’ and of course nesting boxes for birds, like the tree swallow.

4- Water. This is the single most impactful feature that you can add to your garden if you are interested in attracting pollinators and beneficial wildlife. Your yard can become the watering hole for a host of butterflies, native bees, dragon flies (yes, they are beneficial and they eat a lot of mosquitoes), frogs, toads and you name it. All you must do is make sure that the water is fresh and available to all who pass by. And when they do, watch out because babies will result and that means more ‘beneficials’! Many insects will bathe and drink where shallow water occurs.  For butterflies, fill a container with water and line it with marbles, with water just below the top of the marbles, will help provide access to the water, without the risk of drowning.

Attracting pollinators to your yard or balcony provides benefits to your entire community: 30% of the food that we eat is pollinated by insects and hummingbirds.

Keep in mind that bees are attracted to white, yellow, blue and purple flowers more so than other colours.

For more information go to http://landscapeontario.com/pollinator-friendly-garden.

For more advice and answers to over 10,000 gardening questions, visit www.markcullen.com and sign up for Mark and Ben’s free monthly newsletter.

Christmas Cactus Care

Christmas Cactus

Did you know the Christmas Cactus (Schlumberga x buckleyi,) is originally from the tropical rain forests in Southeast Brazil? They lived in the treetops, branch hollows and decayed leaves above the ground. So not the hot, dry conditions of the desert as the word ‘cactus’ might make us think.

Christmas cactus grow better when they are “pot bound”, or when the container and root system are about the same size. They should also have organic, humus-rich soil. They require bright, indirect light or filtered light and enough moister that potting material does not dry out, but don’t over water. Rainwater or snow melted to room temperature is the best to prevent mineral and salt buildups.

So, enjoy the beautiful plant, keep it in bright window light (with partial sun, too much can burn the leaves) and water it moderately over the holidays. The cactus requires frequent and thorough watering, during its active growth in spring and summer, keeping the soil slightly moist. Allow Christmas cactus moisture levels to drop and dry out some between watering intervals, but never completely, and never let the plant sit in water, as this will lead to root and stem rot.

Re-potting should be done once a year in a little larger pot with clean organic soil, preferably in the spring. When new growth starts in the spring add a diluted solution of houseplant fertilizer every two to three weeks until the new growth has finished (around mid summer).

If you would like your Christmas cactus to bloom again, around mid-September or October you are going to have to start paying attention to temperature and light. Keep the plant at cool nighttime temperatures (10-12˚C) and then warmer daytime (around 15˚C) and you should see buds by December. The plant needs continuous, uninterrupted darkness for 12-14 hours (that means no artificial light at all) and bright to medium window exposure for the remaining hours. But, if the plant is in a room where the lights are even turned on for a short period of time, the flowers might not come. This is why you might see a cactus with blooms on only one part of it.

When you start to see buds, the plant can then remain in the window for display and watering you increase. Remember to keep the soil moist but not soggy.

Photo: World Of Succulents


Harvest Time

Fall Harvest Picture

Garden Tips from Mark and Ben Cullen

We are always happy to hear from gardeners who have jumped on the ‘grow your own’ band wagon. Many first-time veggie gardeners are contacting us to find out what to do with their abundance of tomatoes, squash, carrots and the like.

“What now? “  Time was, you would dig it all up and stuff it in a root cellar.  Today of course, we have freezers, refrigerators and some pretty sophisticated methods for preserving fruits and veggies.

What to do with:

Tomatoes:  If you still have lots of red tomatoes the answer is simple.  Eat what you can and preserve the rest as tomato paste, ‘spaghetti’ sauce or just skin them, bag them and freeze them for future use.

If you wish to ripen the green tomatoes indoors and retrieve them from the plants before the frost gets to them, try this: use old oven racks or some other raised platform, place the green tomatoes on newspaper which is spread over the rack. Good air circulation is important.  Place in a cool place.  They will ripen in a dark room more slowly than in a bright one, but either work.  Place them on the rack(s) with a centimeter or two between each.  Turn them every couple of days and inspect for rot or mildew.  Toss the infected ones onto the compost.  We know people that have eaten tomatoes stored this way right into the first week of January.

Peppers: Harvest ripe peppers before they are hit by first frost. Wash in cool water and place in boiling water for 5 minutes.  Remove the peppers from the boiling water and allow them to cool for 1 minute.  Next wrap the peppers in plastic wrap and store in the freezer.  Peppers will last up to 30 days with this storage method.

Winter Squash: Store only fully matured squash. Harvest before the first frost.  Leave 3” of the stem attached.  Keep the squash in a warm, dry and ventilated area for 2 weeks.  Once the squash has cured you can move it into cool storage.  The ideal storage is a cold room around 50-55 degrees.  Store squash on racks so they don’t touch.  Well-cured, fully-ripe squash will keep until late February.

Potatoes: Store potatoes in an unheated basement or garage insulated to protect against freezing. The best location for home storage is cool, dark and ventilated.  Perforated plastic bags can be used to maintain humidity levels while allowing air flow.

Carrots: One option is to leave carrots in the ground and cover them with an unopened bale of straw for the winter. As you need them for cooking, pull the straw back and dig the fresh carrots out of the ground right up until the very hard frost of late December or January.   Alternatively, you can dig up all of your carrots and ‘replant’ them into bushel baskets filled with sharp sand. Keep the carrot tops intact as the root loses much of its nutrients shortly after the top is cut off.  Place the baskets in your garage, preferably against the wall that is attached to your house where the temp is about 5 degrees warmer.  You will be ‘pulling’ fresh carrots all winter long.

Apples: Harvest apples carefully to avoid bruises which will prevent them from keeping well. Late season apples are the best for storing.  Harvest before the first heavy frost.  Store apples in the dark in shallow trays of shredded newsprint.  The temperature should be cool but not frosty.  An unheated basement or garage can be an ideal storage location as long as they are free from rodents.

Keep in mind that some veggies actually improve in flavour with frost. Leeks, kale, Brussels sprouts and cabbage fall into this category.

For more information and to answer over 10,000 gardening questions, visit www.markcullen.com and sign up for Mark and Ben’s free monthly newsletter.

Photo from: www.scholastic.com

Book Nook: Garden Gratitude Journal

Gardener's Gratitude Journal

When you have a hit or miss in your garden where are you going to celebrate it? In the Three Year Garden Gratitude Journal: Part Diary, Part Personal Growing Guide by Donna Balzer and Chelsie Anderson (2018). This is an entertaining read from two expert gardeners. Author Niki Jabbour says “It’s a beautiful, practical and inspiring book.”

Outdoor Lifestyle Expert Carson Arthur says: “Love the concept! Journaling and gardening are both trends that Millennials are incorporating into their lives. What a wonderful way to link them together.”

Start writing anytime — this journal is designed for three years but undated so the best time to start writing is right now. Create you garden memoir by keeping records and daily nature notes all in one place. Jot down a line a day to record your highlights, your hits and your misses.

Every gardener and nature lover benefits from paying attention. This journal lets you track the impact of your garden choices over three years.

Gardener's Gratitude Journal

Gardener’s Gratitude Journal

Buy the journal online at: https://donnabalzer.com/garden-journal/ and get the fantastic bonus sheet of 63 stickers to record that bonus harvest or flower you love.

More Info: https://donnabalzer.com


Fall Weather is Perfect for Planting

Fall Garden Picture

Fall is a fabulous time to tackle landscaping tasks in your yard. In fact, some seasoned gardeners believe fall rivals spring when it comes to the number of gardening opportunities. Don’t put away that garden spade just yet — you’ve got some planting to do! Here is a list of tips to help you get the job done:

Plant more plants
Fall is a great time for planting because the soil temperature is perfect for root establishment. Perennials, vines, shrubs and trees can all be planted up to six weeks before the ground completely freezes. Be sure to keep new plantings watered until the ground is frozen. Fall is the time to plant spring-flowering bulbs such as tulips, daffodils and summer-blooming lilies. Tip: To avoid your treasures from being dug up by squirrels, cover the newly planted area with chicken wire, then cover with shredded leaves or mulch to cover any scent. It’s also a great time to visit your local garden centre to check out new arrivals especially for the fall planting season.

Decide and divide
When perennials begin to bloom less, clumps become too large or start dying out in the centre. If you want to increase the number of clumps or move them to another location, it’s time to decide and divide. Dig up the entire clump and use a sharp spade or heavy knife to cut it into smaller sections, just as you would cut up a pie. Replant the sections and water them well.

There are two prime times to divide perennials: Spring-flowering perennials are divided in the fall; summer-flowering and fall-flowering perennials are divided in spring. Some plants can be divided anytime. This splits up the task into two seasons and makes the job easier. Fall is the perfect time to expand the flowering times in your collection as most garden centres stock a wonderful selection of fall flowering plants.

To cut or not to cut?
Avoid shearing hedges and pruning deciduous trees in the fall. Pruning stimulates new growth which is best left for spring and summer, however any unruly shoots can be safely snipped. Cut back perennials that self-seed or have no winter interest, leaving six to eight inches of stubble to trap the snow and insulate the crown over winter. Perennials such as sedums and ornamental grasses are outstanding features in the winter garden and can be cut back in spring.

Leave the leaves
If you have a mulching mower, mulch fallen leaves right into your lawn, rather than raking. If you have too many leaves, run the mower over the leaves first, then rake them up and apply as organic matter to your garden or simply add to your compost bin. Shredded leaves break down into humus faster than non-shredded leaves. Humus helps to retain soil moisture and nutrients that plants then utilize.

Healthy harvest
Canning sun-ripened tomatoes and drying fresh herbs (such as parsley and oregano), can add wonderful aromas to your home and add home-made goodness to meals. Fresh herb aromas and a freshly baked fall apple pie just prior to an open house have been known to sell a home!

Water-wise
Be sure to keep within the guidelines of municipal water restrictions, yet keep your garden watered in the fall right until freeze-up as plants are still growing.

Urning for containers
Add some fall flair to your summer containers by switching up plants with flowering kale, ornamental cabbages or colourful, fall mums.

Seeding and sodding
September is the best time for turf establishment as the air temperatures are cooler and there are fewer germinating weed seeds. Applying a fall lawn fertilizer ensures the hardiness of grass before the harsh winter.

Bring the outside in
Before the first hard frost, dig up any tender bulbs and tubers, such as dahlias and cannas, and store them in a cool dark place for replanting next spring. Bring in any tropical plants from their patio location. Be sure to hose them down with insecticidal soap and water to ensure no travelling pests hitch a ride indoors for a cozy winter retreat.

Help from the pros
The fall gardening season truly is a busy time! If you simply don’t have the time or the energy to prepare your property for the coming seasons, why not hire a professional to do the work for you? For more tips and advice, or to connect with one of over 2,000 members of Landscape Ontario, visit: LandscapeOntario.com

From Denis Flangan, Landscape Ontario

About Landscape Ontario Horticultural Trades Association
Landscape Ontario Horticultural Trades Association is one of the most vibrant associations of its kind, comprised of over 2,000 members, ten sector groups and nine local chapters. Its trade mission is to promote the horticulture industry in Ontario, and its public mission is to promote the joys and benefits of green spaces.

Tulip Bulb Care (Removing From Flower Beds)

Bulbs

On November 7, 2016, 42 energetic students from grades 9 to 12 from St. Joan of Arc Catholic Secondary School came to the Canada Blooms/Landscape Ontario site at Milton to plant 6,650 spring bulbs generously donated by Van Hoff and Blokker, Tradewinds, Mark Cullen and Landscape Ontario members.

Now the beautiful tulips have bloomed and peaked, and we were wondering what to do with them (at least with the ones the squirrel left alone), so we reached out to Carolyn de Vries from Tradewinds International for some advice.

Here is what she suggested:

If you wish to remove the tulips from the flower beds for other plantings, yet you still wish to keep the bulbs, then you should:

1. Deadhead by cutting back stem to above first leaf
2. Lift the bulb, stem and leaves
3. Store in a dark place adding peat to ensure bulbs are kept dry
4. Planting time in the fall, clean up bulbs by removing dried foliage
5. Plant
6. Enjoy them in the spring

Tradewinds International